Windows PCs
This part of this article will focus primarily on how screenshots work with Windows 7.
Print Screen
Print Screen is a button on the keyboard. It is typically located on the top row, between the F12 key and the Scroll Lock key. The Print Screen key is sometimes labeled PrtScn or Prt Scr on the keyboard.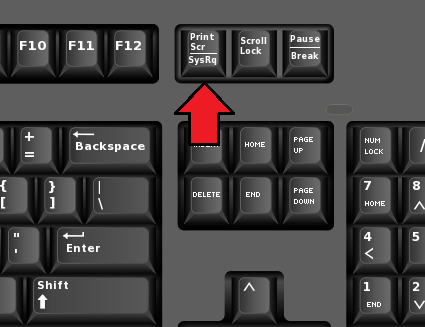
- Upon pressing Print Screen, an image of your entire visible screen will be saved to your clipboard. In order to view and save this image, you have to paste it into an image editor like Paint with Ctrl + V. Other applications also support pasting images, such as Word and Gmail.
- If you hold the Windows key while pressing Print Screen, you will save the image to your hard drive automatically, typically located in C:\Users\yourusername\Pictures\Screenshots.
- Holding the Alt key while pressing Print Screen will take a picture of the currently active window. This can be combined with the Windows key to instantly save the image.
Optional Way (For Windows)
- You can click the windows button + Shift + S to also perform a screenshot on Windows.
Snipping Tool
The Snipping Tool is an alternative to the Print Screen method. Snipping Tool is an application that comes with Windows operating systems.
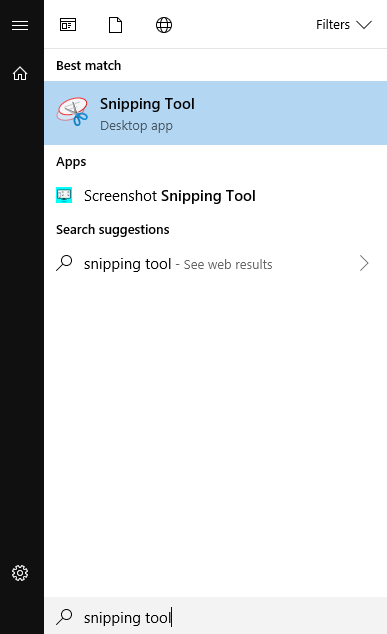
To open the snipping tool:
- Click the Start menu,
- Type "snipping tool" into the search field,
- Click on Snipping Tool program,
-
OR you can start the Snipping Tool program through the start menu by navigating to All Programs > Accessories > Snipping Tool.
By default, Snipping Tool opens in Rectangular Snip mode. By clicking the Mode button, you can switch between screenshot methods.
- Free-Form Snip allows you to freely draw a shape on your screen and capture what’s inside.
- Rectangular Snip allows you to draw a box on the screen to capture what’s inside.
- Window Snip allows you to select a window to take a picture of, akin to Alt + Print Screen.
- Full-Screen Snip takes an image of your entire screen, akin to Print Screen.
Apple Computers
Apple has a simple shortcut for taking screenshots which are saved to the desktop by default.
Press ⌘ + ⇧ + 3 to take a screenshot of the entire display.
Press ⌘ + ⇧ + 4 to take a screenshot of a section of the display. Your cursor will turn into a crosshair (+), which you can use to select the portion of the screen you want to capture. You can also press the Spacebar to change the crosshair into a camera symbol (⌖), which can be used to take a picture of an open window.
Third-Party Applications
- ShareX (Windows) – A free, open-source screen capture tool with no ads, bundled software, or paywalls. It supports screenshots, scrolling captures, and simple annotation (text, arrows, blur). Because it is open-source and community maintained, it avoids the common risks associated with shareware.
- Flameshot – A free, open-source screenshot tool available for Windows, macOS, and Linux. It provides lightweight on-screen annotation tools without subscription prompts or upgrade tiers. It is frequently referenced in academic Linux and cross-platform support documentation.
-
Mozilla Firefox Screenshots – Built directly into the Firefox browser, this free tool allows you to capture a selected area or a full scrolling webpage without installing additional software. It works across Windows and macOS and integrates with Firefox’s accessibility support.
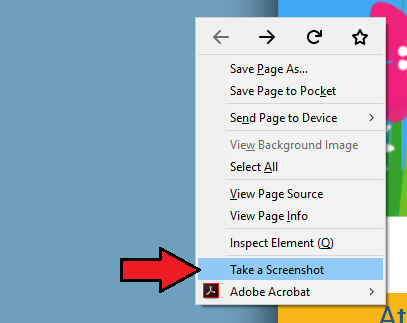
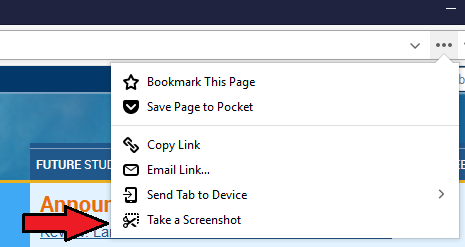
If it’s the first time the tool was opened on the computer, it will open with a brief tutorial. You can use Firefox’s screenshot tool much in the same way as Snipping Tool’s Rectangular Snip tool, but after taking the screenshot it will be automatically uploaded onto Firefox’s temporary image hosting service, giving you a link to share the capture with.
Screenshots on an Android phone (assuming you have Android 9 or 10):
There are two ways to do this.
- Press and hold your power button. You’ll get a pop-out window on the right side of your screen with icons that let you power off, restart, call an emergency number, or take a screenshot. Or...
- Hold down the power button and press the volume-down button.
The screenshot will briefly appear as a smaller version and then disappear, and you’ll get a top notification that lets you share, edit, or delete it.
Some Android phones (for example, certain Samsung and Huawei phones) let you take “long” screenshots, where you can scroll the screen down and capture the entire page. Check your phone’s support pages if you think you might have that — it can be handy.
If you want to find all your past screenshots:
- Go to your Photos app.
- Tap on the three parallel lines in the top left corner.
- Select “Device folders” > “Screenshots.”
Screenshots on an iPhone:
Taking a screenshot with an iPhone is simple and uncomplicated:
- Press the side button and the volume-up button simultaneously. (Note: if you have an older iPhone that has a Home button, you need to press the side button and the Home button instead.)
- You’ll get a thumbnail image of your screenshot in the lower left corner.
- Tap on the image to make it larger; there will be editing tools below. Icons in the upper right corner let you delete it or share it.
- When you’re finished, tap “Done” in the upper left corner. You can save the image to Photos, to Files, or delete it.
Student Help Desk Support (SHeD)
The student help desk is located on main campus in the Library (center building).
- Self-help resources for students
- Email: shed@lanecc.edu
- Phone: (541) 463-3333 (please leave a voice message