In Moodle, grades can be imported in .CSV or .XML format.
- Decide on an import format - CSV or XML file, or paste from spreadsheet (see below) - then export some grades using the corresponding export format.
- Edit the export file as appropriate and save it.
- Tip: If you opened your exported file in Excel, don't add columns there because Moodle will reject the import if there are new columns that didn't exist in the exported file. If you need to add columns, do that in Moodle BEFORE you export your grade book.
- Select your chosen import format from the grade book drop down menu.
- Browse and upload your previously saved file.
- Set options as required.
- Click the Upload grades button.
- CSV import only: Preview the grade import and choose the column mapping then click the Upload grades button to complete the grade import.
CSV import
CSV import is more flexible than XML import because you may choose the column mapping
Grade mapping
After selecting your CSV for import you'll be prompted to map user fields and grade items to the new column headers to ensure that there is a match.
More than one item can be mapped to the same grade item in your destination course so be mindful of the mapping to ensure that grade data is imported properly, any collisions (i.e. if two or more fields are mapped to the same but duplicate data exists) will cause an error.
User grade data for users not yet enrolled to the destination course will be noted (and once enrolled their grade data will display).
Force import
This prevents grade overriding during the grade importing in a scenario where more than one teacher exports the course grades and then re-imports them. If a second teacher exports the grades and tries to import them, the following error message will be displayed and the grade importing procedure will be aborted:
(''Student name'') grades have not been imported because the grades in the import file are older than in the grader report. To proceed with the grade import anyway, use the force import option.It will not be possible to import a file that had been exported longer than a year ago, one with dates in the future. However, in cases where a teacher needs to import the grades regardless, they should use the Force import. option. This will then import the grades irrespective of the dates.
Paste from a spreadsheet
Grades may be pasted directly from a spreadsheet such as Excel or Libre Office:
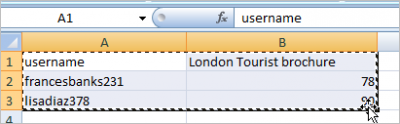
- Ensure you have the correct column names for your grades (eg the assignment title or manual grade) It might help to download and edit the relevant students and graded information by using the Grade export feature.
- For the students you need either their username, their ID or their email address. Add the grades you need and copy the relevant section:
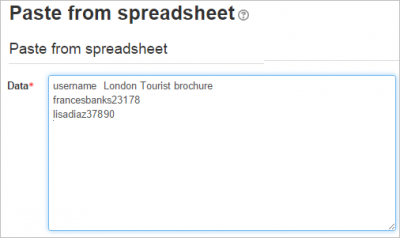
- In your course, go to Grades>Import>Paste from spreadsheet and paste:
- In the preview, ensure you match up the identifier you used for the students -so if you used username, ensure it maps to username. Do the same for your graded activities:

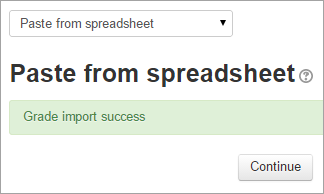
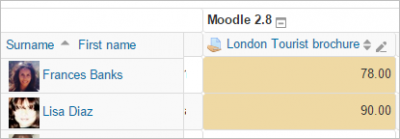
- If everything has been correctly mapped (See grade mapping above), you should get a success message and the grades will have been added, displaying in a different color to show they were imported directly into the grade book:
 |
 |
Paste from a spreadsheet requires similar permissions to a csv file import: (1) general permission to import grades and (2) permission to import grades in a particular format i.e. Moodle/grade:import ("Import grades") = Allow and gradeimport/direct:view ("Import grades from spreadsheet") = Allow
XML Import
Before importing an XML file you will need to ensure that all of the students that you want to alter grades for have their ID number field filled out. This is located in the Optional section of the user edit profile page. You will also need to set the ID number of the activity as well. You can find this under Common module settings when editing the activity.
The format for the XML should be as follows:
<results> <result> <assignment>activityidnumber</assignment> <student>studentidnumber</student> <score>53.00</score> </result> <result> <assignment>differentactivityidnumber</assignment> <student>studentidnumber</student> <score>73.00</score> </result></results>
For a working example try exporting the grade book as an xml file and view the format.
ATC Support & Hours of Operation
Weekday Support, Monday - Friday
- Phone (voicemail only): 541-463-3377 (8am-5pm)
- Email: atc@lanecc.edu (8am-5pm)
- Find our updated hours and support options on the ATC Website
The ATC is open to in-person assistance. Support is available through the above remote options and on campus at CEN 208