Kaltura
Kaltura is the world's first Open Source Online Video Platform, providing video solutions, software, and services for video publishing, management, syndication, and monetization. Kaltura specializes within three verticals: education, enterprise, and media, and can be used for a variety of different cases. Kaltura's open source technology provides you with flexibility in publishing your content. LCC has incorporated Kaltura within Canvas and offers a wide array of options for educators looking to enhance their online presence for their classes.
Below is an introduction to the Canvas module for Kaltura.
The key features Kaltura Video Resource, you will find in your Canvas class web page using the + button across form each module. You as the instructor, and students, can additionally embed media directly into text areas using Kaltura which is discussed in this article enabling variety of video resource options and even video assignments and discussions.
Media Assignments
Video assignments are a great way to encourage more participation in your course by having students record themselves or capture a screen cast of themselves doing a specific technique or skill related to the class. This can be done in lieu of a written assignment. By having students utilize Kaltura to create and upoad video and audio students can discuss the technique being done on the screen.
Get started by creating a normal Assignment or Discussion in Canvas and provide students with guidance and instruction on utilizing Kaltura to create and embed their content.
These instructions can be included in your activity instructions directly in Canvas or linked to for students to follow.
Kaltura Video Resources
Within Canvas, you can upload and create video content for presentation purposes through the Kaltura module found under the + button across from any module header. Whether you want to create a welcome video, demonstration video or how-to video, the Kaltura option allows for seamless integration of media for your class.
Below instructions on how to use the Kaltura video resource and how to embed videos directly onto your Canvas Modules page.
Directions
- Go to your Canvas class website to begin. Whether you are uploading content already created, doing a screen recording or webcam recording, you must first go to the + option across form the section header you wish to add the content.

- Change the Add drop down to External Tool.

- Select Video Resource (Kaltura) from the list.

- You can now select Embed across from the video you want to add if you have uploaded it previously in the past or select Add New to access options like Media Upload and Express Capture.

- Once a video is selected select Add Item at the bottom right of the Add Item window.

Media Upload Option
If you already have content to upload to the Kaltura server for use in Canvas, simply use this option, and follow the instructions on how to use the My Media space to upload videos:
- Log into Canvas.
- Access the My Media (Kaltura) option the left hand global navigation.

- Select Add New at the top right and select Media Upload.

- Select Choose a file to upload and follow prompts to select the file you want to upload form your computer, or you can drag and drop the file into the box on the page.
- Let the upload complete until the bar at the top shows green and says “Upload Complete” at the top of the page.

- You can optionally give it a new name and a new description.
- Select Save at the bottom of the page and select Go to My Media after it saves successfully.
Express Capture
If you choose this option, another popup window will come up. If you have never used this feature before you may get a prompt that asks permission to use your webcam and microphone.
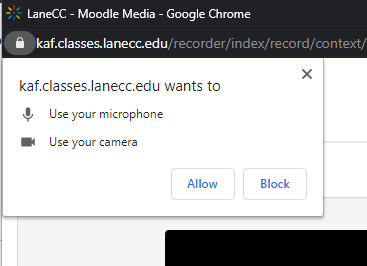
Once you agree, your webcam and microphone will be enabled and you should see your face showing on the screen in front of you.
- At this point, you have the ability to record yourself by clicking the red circle on the screen to start the recording.
- To stop it just click the stop button with the recording time.
- You can change the webcam and mic used by clicking the gear at the top right of the recording window.
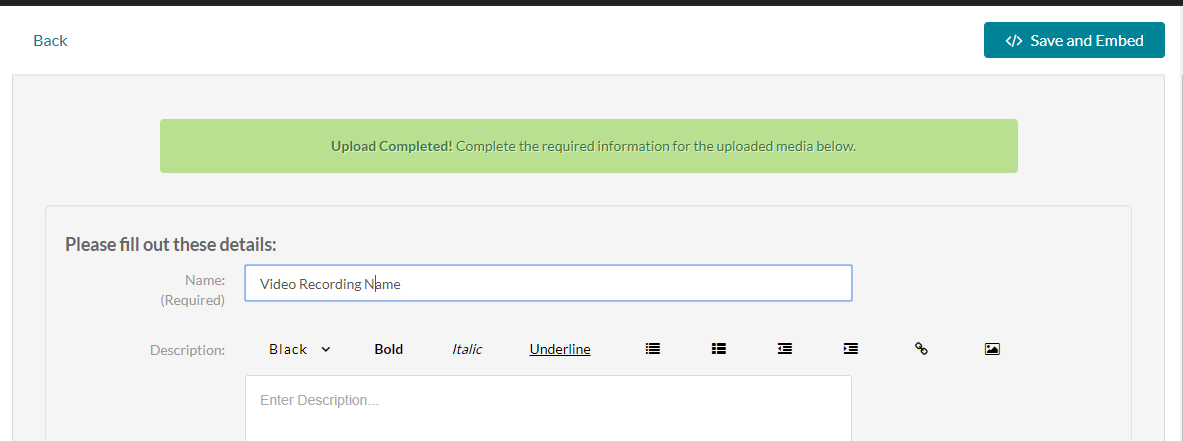
Once done you are given the option to Record again, Download a copy, and Use this. Use this will upload the video and let you change the name and description of the video.

Click Save and Embed at the top right to add it as the resource.
Embed Kaltura Videos
You can embed video content directly into any text area in Moodle where text editing options are given. This is available for both instructors and students.
Where is my Media stored?
Any video uploaded to Canvas as a resource or just as embedded content gets added to your My Media (Kaltura) gallery. This can be found in the left hand Global navigation by scrolling to very bottom. These videos are user specific and can only be seen at the place it was embedded or by that user in My Media.
Contact Academic Technology
ATC Support Updates and Hours of Operation The ATC is closed to in-person assista...
ATC Support & Hours of Operation
Weekday Support, Monday - Friday
- Phone (voicemail only): 541-463-3377 (8am-5pm)
- Email: atc@lanecc.edu (8am-5pm)
- Find our updated hours and support options on the ATC Website
The ATC is open to in-person assistance. Support is available through the above remote options and on campus at CEN 208