Zoom Recordings Auto Expire in 1 Year
Zoom cloud recordings are available until 1 year after the recording date. Uploading your cloud recordings to Kaltura will allow you to share, access, and store your recordings for longer periods of time.
Downloading and uploading video files requires ultra-fast internet service. We highly recommend using a hardwired connection on Main Campus. Even with an ultra-fast connection, it can take hours for the file process to complete — especially for long format meetings/recordings.
Download Zoom Recording
- Open a web browser and navigate to Lane Community College's Zoom page
Choose the “Sign in” button.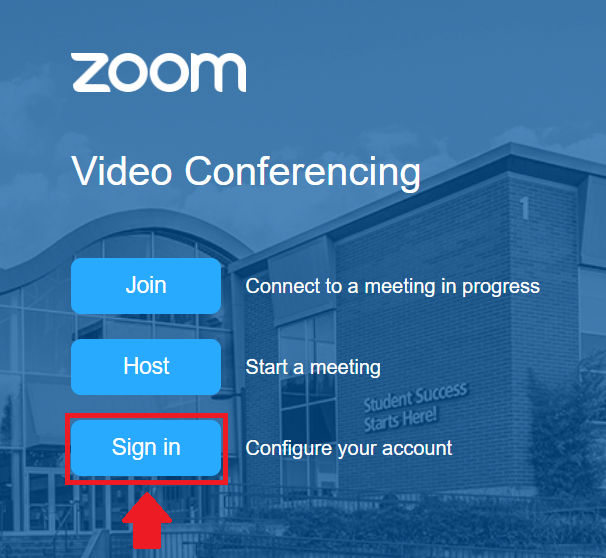
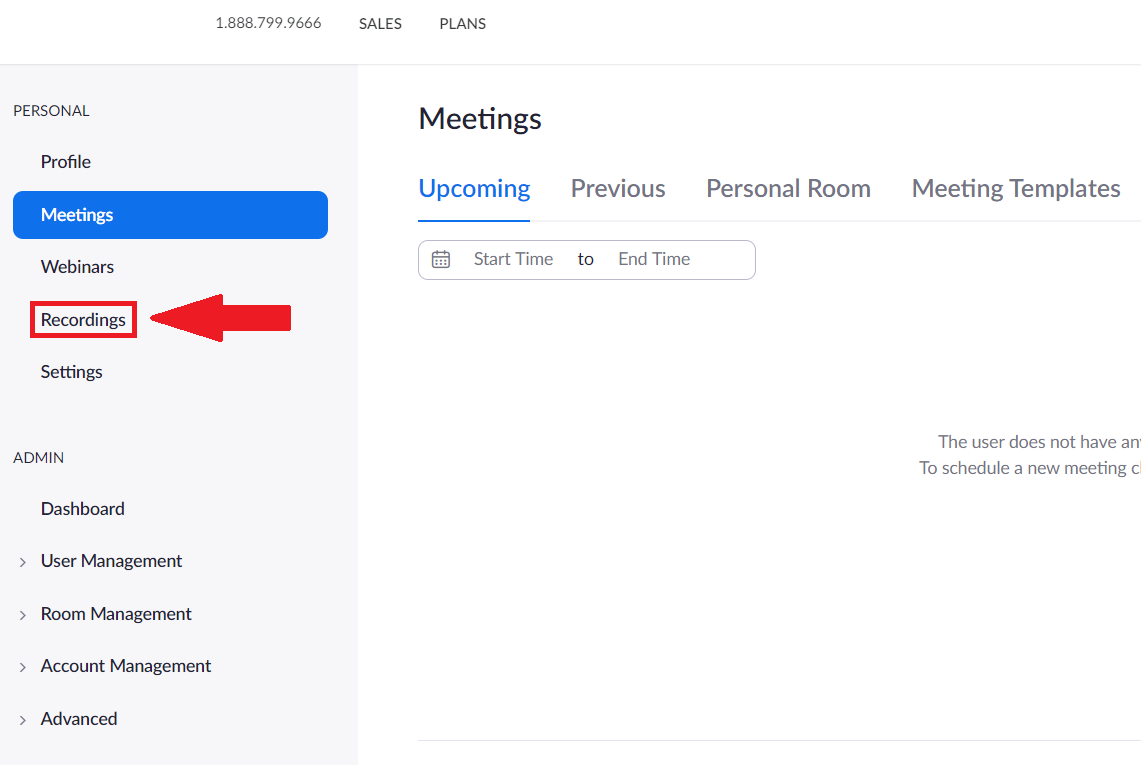
Click “Recordings” on the left sidebar to access your Zoom cloud recordings
 Navigate to the recording you would like to download. Click the “More” button to open a drop-down menu. Select the “Download” button. The download will start automatically.
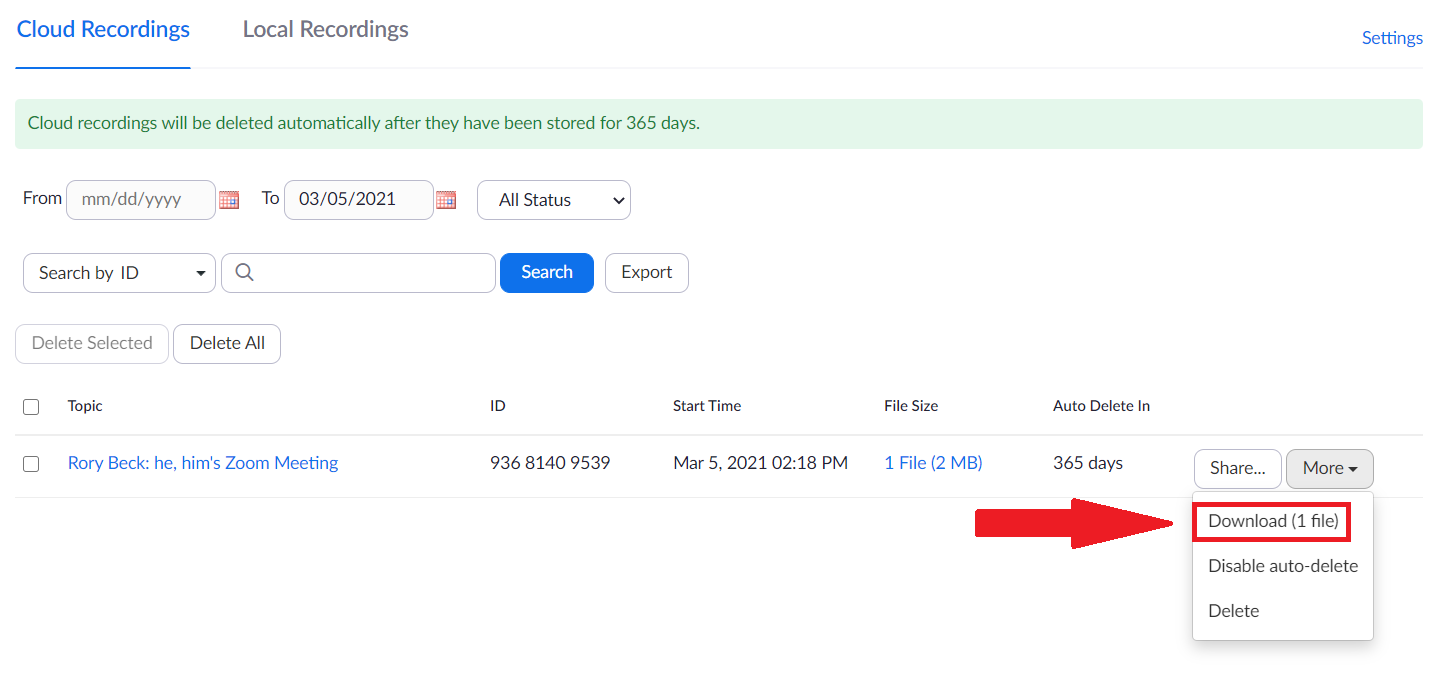
Note:
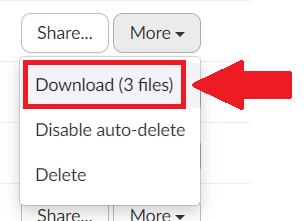
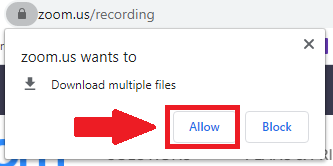
Some cloud recordings have more than one file denoted by the parentheses after the file name i.e. “Download (3 files)”. If this is the case, you may see a pop-up notification asking you to give Zoom permission to download. The pop-up location may vary depending on the browser you are using.
Upload to Moodle using Kaltura
Using Moodle to put the videos into Kaltura, which has unlimited storage for video and audio files, is ideal for long-term storage of video and audio. When it is added to Moodle the video will still be accessible even after the course gets archived.
- After the download has finished, navigate to Moodle and sign in with your Lane credentials.
- Select the “My Media” button on the left-hand dashboard.

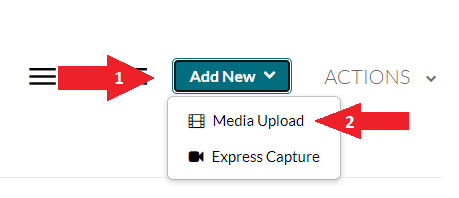
- Select the “Add New” dropdown menu. Then click “Media Upload.”
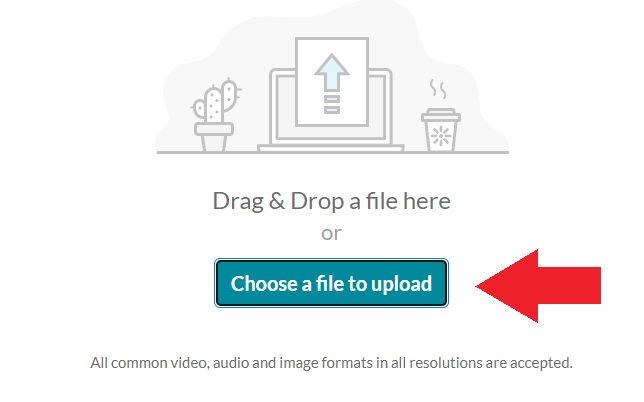
- Click the “Choose a file to upload” button.
- Select the MP4 file from Zoom that you want to upload and choose “Open”
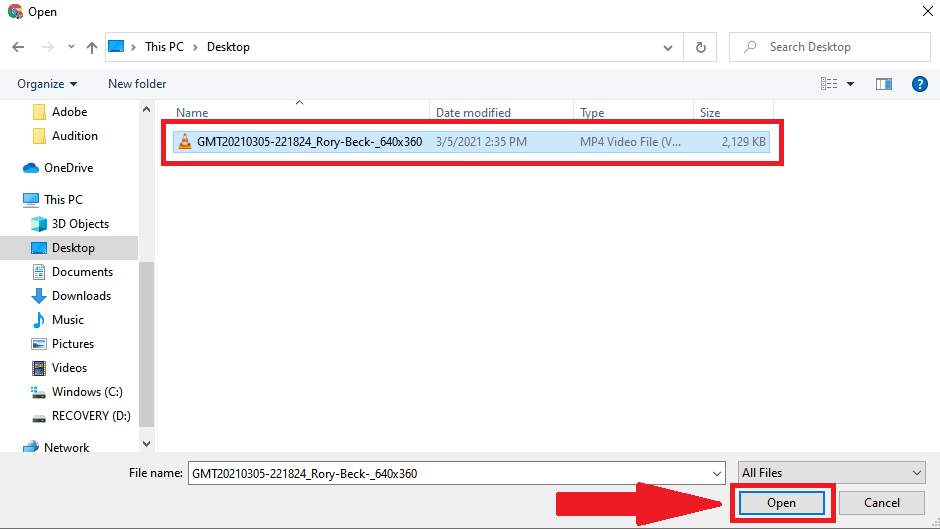
- Tip: Most downloaded videos from zoom will be in your downloads folder. Use the menu on the left in to file uploaded to select downloads and look at the date modified to find your most recent file. You can also identify the file type in the same area.
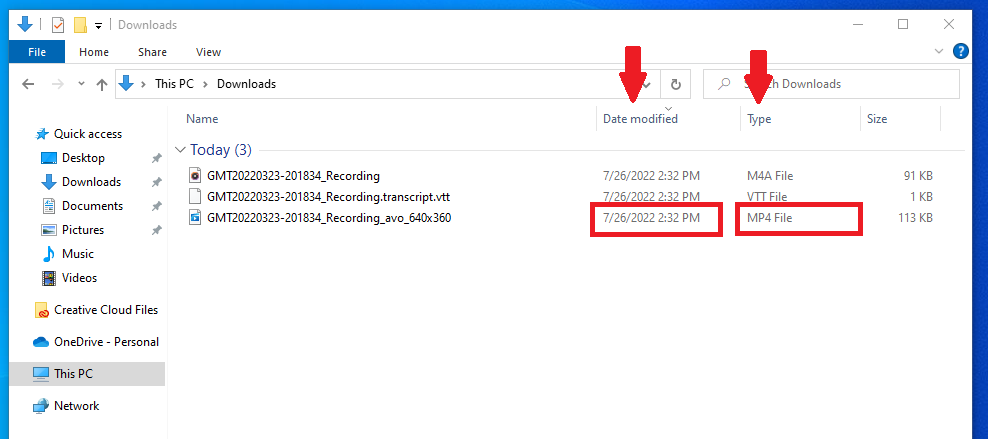
- Tip: Most downloaded videos from zoom will be in your downloads folder. Use the menu on the left in to file uploaded to select downloads and look at the date modified to find your most recent file. You can also identify the file type in the same area.
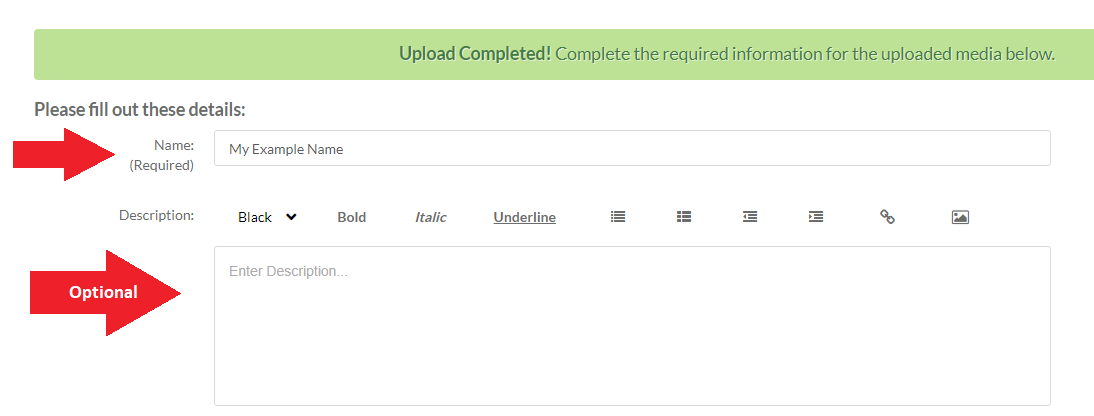
- Once the upload is complete, give your media a name and optionally, a description (optional).
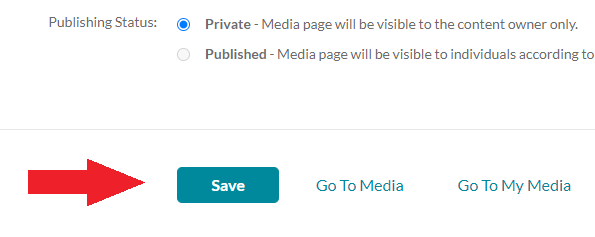
- To complete your upload, leave the publishing status set to private and click “Save.”
- You can now safely keep your uploaded Zoom recordings in your Kaltura Media to view and share.
Setting up Student Access
Using Video in the Classroom: Kaltura
Contact Academic Technology
ATC Support Updates and Hours of Operation The ATC is closed to in-person assista...
ATC Support & Hours of Operation
Weekday Support, Monday - Friday
- Phone (voicemail only): 541-463-3377 (8am-5pm)
- Email: atc@lanecc.edu (8am-5pm)
- Find our updated hours and support options on the ATC Website
The ATC is open to in-person assistance. Support is available through the above remote options and on campus at CEN 208