This article covers:
Download and Install
Log in and Set-Up
Schedule a Meeting
Personal Meeting ID
Meeting Control
Download and Install
Before you can use Zoom, you must download and install the Zoom software for your device. Start by going to https://zoom.us/support/download to download the Zoom Client for Meetings.
Log In and Set-Up
To sign in, you can use your L-Number (SSO), Lane Google account credentials, or a username and password unique only to Zoom.
Zoom Website- Used to manage profile, change settings, and schedule meetings
Go to https://lanecc.zoom.us and select sign in
- You will be redirected to your single sign-on provider to sign in. Use your L# and mylane password in that browser window. After signing in, you will be redirected back to your Zoom profile.
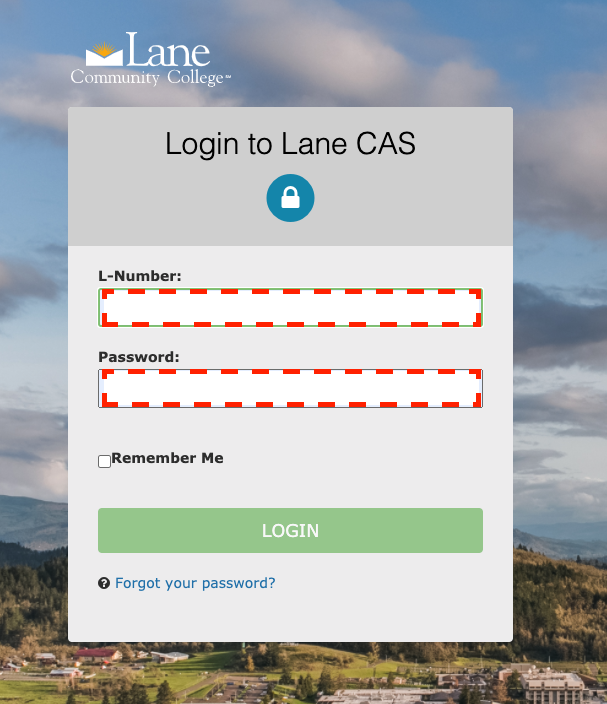
If you do not have an L# you will need to navigate to https://zoom.us and sign in with your Lane Community College Google account .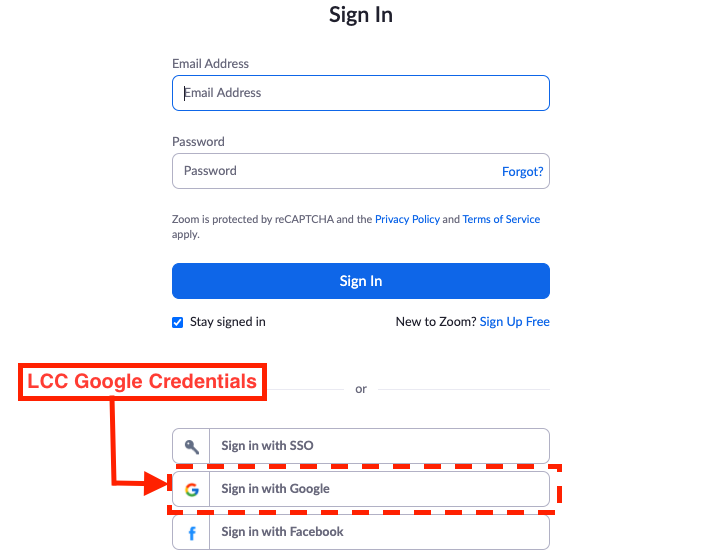
If you do not have a Lane Google Account contact the ATC (atc@lanecc.edu) or SHeD (shed@lanecc.edu) for an invitation to create a Zoom profile and set up a unique username and password.
Zoom Meeting Client - Host and join zoom video conference meetings (Sign in separately)
Once the Zoom Client for Meetings is installed, launch the application and click the Sign In button
Select “Sign in with SSO” to sign in with your L-Number.
You will be redirected to your single sign-on provider to sign in. Use your L# and mylane password in that browser window. After signing in, you will be redirected back to the Zoom Desktop Client.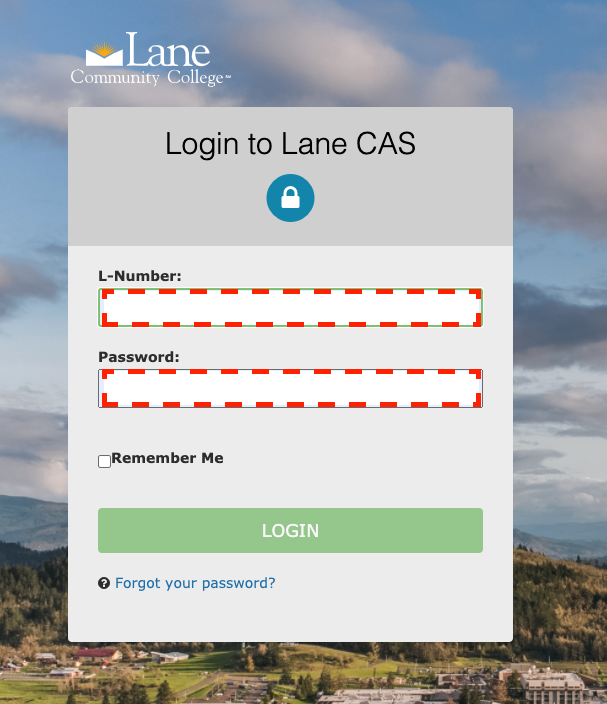
If you don’t have an L# you will need to select sign in with a google account
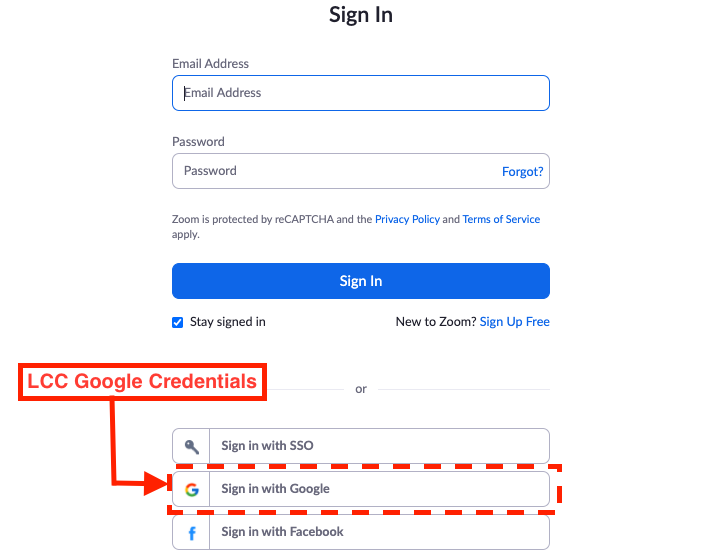
If you do not have a Lane Google Account contact the ATC (atc@lanecc.edu) or SHeD (shed@lanecc.edu) for an invitation to create a Zoom profile and set up a unique username and password.
More detailed information can be found online at: https://support.zoom.us/hc/en-us/articles/201362033-Getting-Started-on-Windows-and-Mac
Schedule a Meeting
Zoom Website(lanecc.zoom.us)
Go to https://lanecc.zoom.us and sign in
Select the meetings tab on the left side of the web page
Click Schedule a New Meeting
Enter the meeting details and click Save
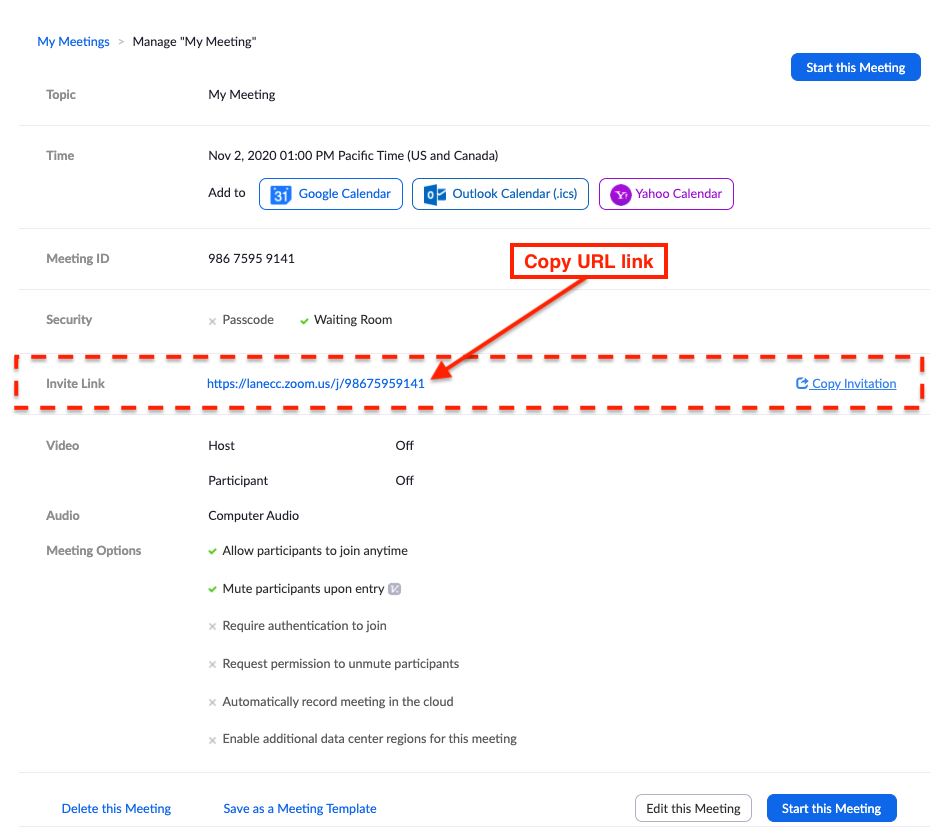
After saving you will be shown the saved details of your meeting including an “Invite link” containing a URL that can be copied and sent to attendees.
More detailed information can be found online at: https://support.zoom.us/hc/en-us/articles/201362413-Scheduling-meetings
Personal Meeting ID (PMI)
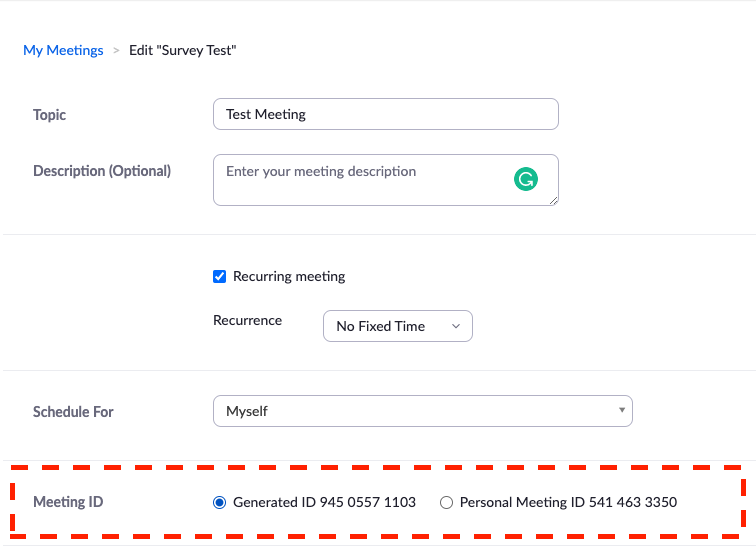
When scheduling a meeting you will have an option to use a “Generated ID” or your “Personal Meeting ID”. Your Personal Meeting ID is assigned to you automatically as a permanent virtual meeting room. You can start it at any time or schedule it for future use. We recommend keeping your Personal Meeting ID private and only use it with trusted individuals since it doesn’t ever change.
More detailed information can be found online at: https://support.zoom.us/hc/en-us/articles/203276937-Using-Personal-Meeting-ID-PMI-
Meeting Controls
Join Audio
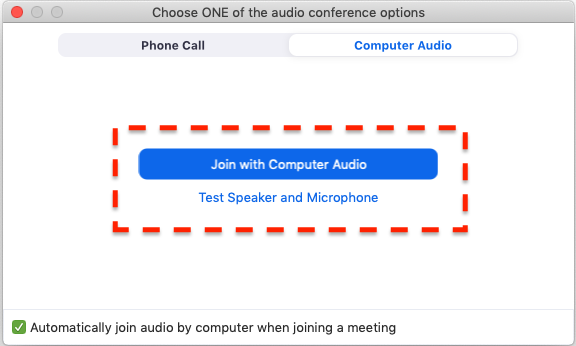
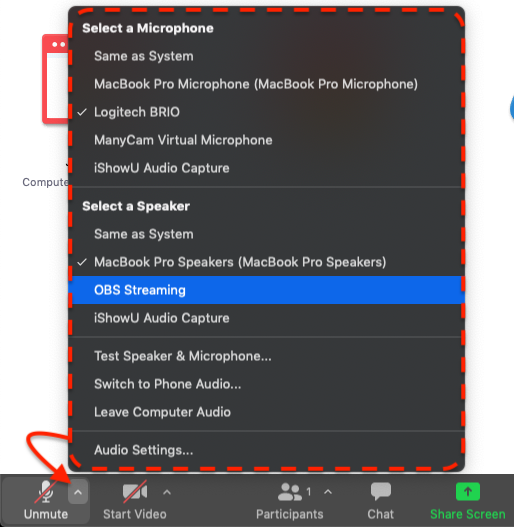
After joining or starting a meeting, you can join audio by phone or by computer. Choose Join with Computer Audio to connect your computer’s speaker and microphone to the Zoom meeting. You can test your audio connection before joining by clicking the Test Computer Audio link.
Mute/Unmute Microphone:
After joining audio, you can choose to Mute or UnMute your microphone by clicking the microphone icon in the bottom left of the Zoom window. Adjust your microphone and speaker settings by clicking the small arrow next to the microphone icon.
Start/Stop Video
The “Start Video” button is located at the bottom of the Zoom window.
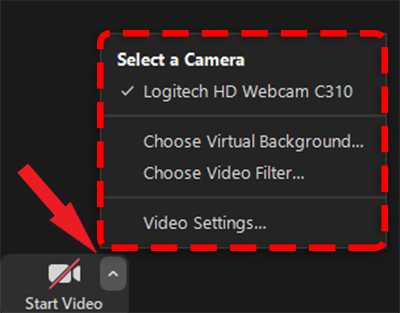
During a meeting, click the camera icon in the meeting toolbar to Start Video or Stop Video. Adjust your camera settings and choose a different camera by clicking the small arrow next to the camera icon.
Manage Participants
The Participants button is located at the bottom of the Zoom window.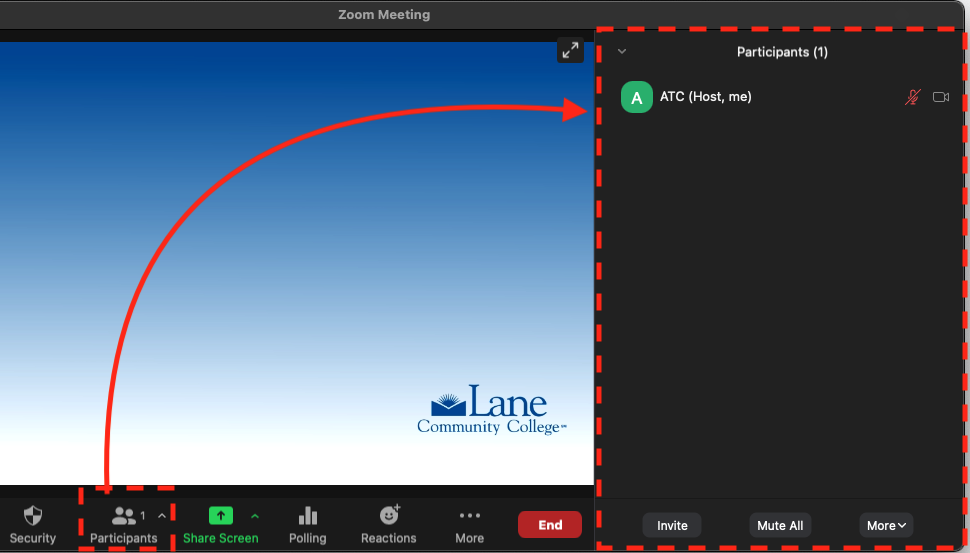 When you click the button, it will toggle a sidebar window that lists the participants in the meeting. This panel is where you can manage who is in the meeting and mute/unmute a participant’s microphone.
To share your screen or desktop, select the Share Screen button located in your meeting toolbar at the bottom of the Zoom window. Another window will open allowing you to choose to share your desktop, an individual application/window, or start a whiteboard. After selecting a source, click the blue Share button in the bottom right corner of that window to begin sharing.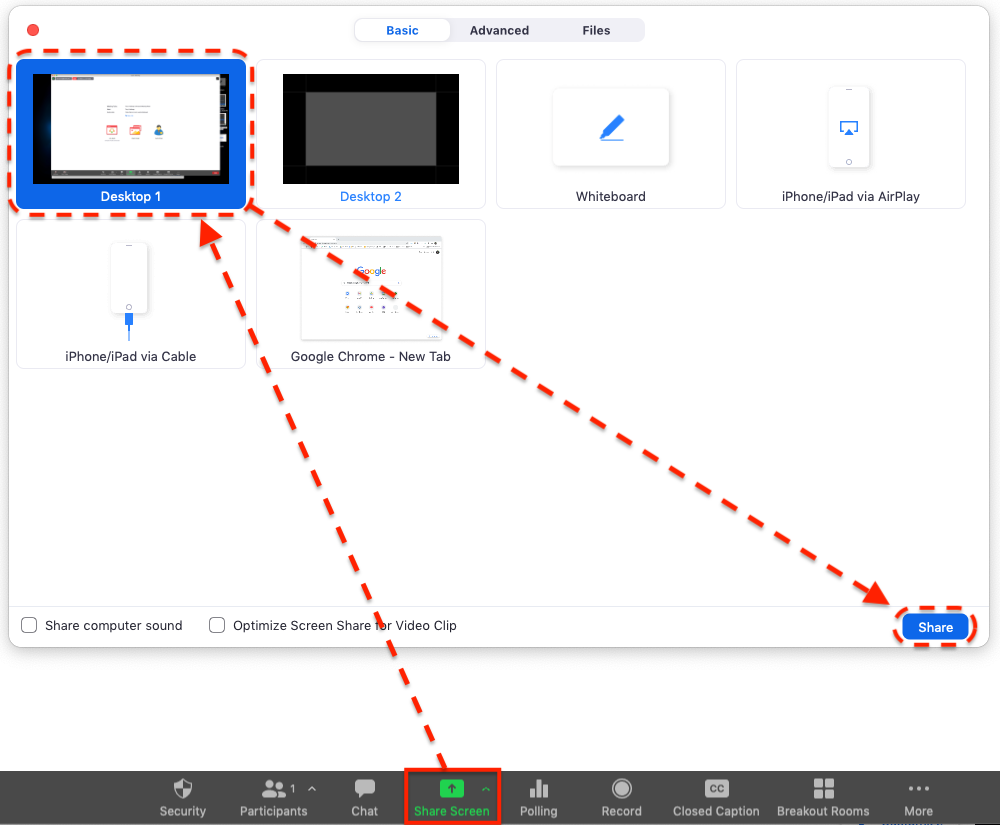
When sharing, your meeting toolbar moves from the bottom to the top of the screen. When you are done sharing, click the red button that says Stop Share.
Chat
Click Chat in the bottom toolbar to send instant messages with other participants while in the meeting.
In the Chat window, click the drop-down to select if you want the message to go to everyone in the meeting or a single participant.
Record Meeting
If you are a host, you can record the meeting. Click Record in the meeting toolbar.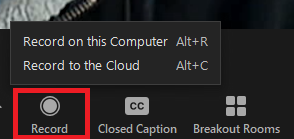
To stop or pause the recording hit the stop icon in the meeting toolbar
Access your cloud recordings from the Zoom Website (sign in at lanecc.zoom.us) under Recording.
Leave the Meeting
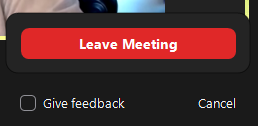
You can leave a meeting by selecting the “leave meeting” button in the bottom left.
Free online support for Zoom is available 24/7 at support.zoom.us.
ATC Support & Hours of Operation
Weekday Support, Monday - Friday
- Phone (voicemail only): 541-463-3377 (8am-5pm)
- Email: atc@lanecc.edu (8am-5pm)
- Find our updated hours and support options on the ATC Website
The ATC is open to in-person assistance. Support is available through the above remote options and on campus at CEN 208